Service monitoring on Googles Cloud Platform
21/08/2024
I had a reason to run an instance of uptime-kuma, which is a service monitor, so I put together a little guide to setting this up on Googles Cloud Platform free tier.
Initial Setup
1. Create Google Cloud account
2. We need to upload a .raw image of Alpine to our Google Cloud account. To do this, create a new bucket at https://console.cloud.google.com/storage/browser
3. Download the Google Cloud Platform build of Alpine at https://alpinelinux.org/cloud/ ensure you select the latest release, x86_64, BIOS, Virtual. Then Download the tiny image
4. GCP requires the image be in .tar.gz format and called disk.raw, so rename the .raw image, then archive it.
5. Upload this .tar.gz to the Google Cloud bucket you made.
6. We need to create an image that this VM will be based on. Go to https://console.cloud.google.com/compute/images and select Create Image
7. Name your image, select Cloud Storage file as the source, and select the .tar.gz file you uploaded to your bucket. Then click create.
8. Create a new VM instance with the following:
- 1 non-preemptible e2-micro VM instance per month in one of the following US regions:
o Oregon: us-west1 o Iowa: us-central1 o South Carolina: us-east1
- 30 GB-months standard persistent disk
- 1 GB of outbound data transfer from North America to all region destinations (excluding China and Australia) per month
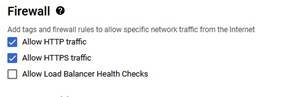
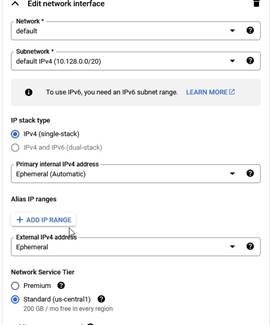
Be sure to select Standard as the Network Service Tier, it is premium by default
Change the Boot disk, under image select the image we made.
Ensure you select Standard persistent disk as the Disk type Set the size to 30GB

Under security, add an ssh public key which will be used to login. At the end of the public key, change the username to alpine.
Virtual Machine
1. Connect to your instance using the ssh key you uploaded and the username alpine: ssh
-i <keyfile> alpine@<ip>
a. You can find your IP in the VM instances tab of GCP
2. Set password, update, install packages
a. echo "alpine:passwordhere" | doas chpasswd
b. doas apk update
c. doas apk upgrade
d. doas apk add docker
e. doas apk add caddy
3. Setup environment
a. doas rc-update add docker default
b. doas rc-update add caddy default
c. printf "<yourdomain.tld>\n{\nreverse_proxy :3001\n}\n" | doas tee -a
/etc/caddy/Caddyfile
d. printf "ChallengeResponseAuthentication no\nPasswordAuthentication no\nPermitRootLogin no\nPermitRootLogin prohibit-password\n" | doas tee
-a /etc/ssh/sshd_config
e. doas reboot
f. reconnect to your vm
4. create and run docker image
a. mkdir /home/alpine/kuma
b. cd /home/alpine/kuma
c. doas docker run -d --dns 1.1.1.1 --restart=always -p 3001:3001 -v /home/alpine/kuma:/app/data --name uptime-kuma louislam/uptimekuma:1-alpine
DDNS
1. The free tier GCP vm has a dynamic IP and I have experienced it changing between reboots. So we need to setup dynamic DNS and a hostname that points to our domain.
a. Add an A record to your DNS records pointing to the vm’s IP
b. Each registrar has their own API for doing DDNS updates, find a script for your service, place it at /home/alpine/scripts/ddns.sh and add it as a cronjob at boot and hourly on your vm
i. chmod +x /home/alpine/scripts/ddns.sh
ii. crontab -e
iii. add: 0 * * * * /home/alpine/scripts/ddns.sh
iv. add: @reboot /home/alpine/scripts/ddns.sh
c. Note, GoDaddy changed their API requirements, unless you have 50 domains with GoDaddy, you may no longer use their DNS API, you’re out of luck.
You can now access uptime-kuma at your domain.